I bet 95% of you read that title and your eyes immediately glazed over, am I right? (That’s okay. I still love you! Please love me back.) But for the 5% of you (and that number might be generous) who immediately did an internal happy dance, this is for you.

I’ve been doing a ton with clabber in my kitchen and on YouTube, but I haven’t much mentioned it here, so it’s high time I get some of the main points down in writing. (I find written instructions to be a more accessible resource than video, though video is stellar for actual teaching purposes. But I digress.)
Some facts:
*Clabber is milk that has been left to sit out at room temperature until it thickens.
*To start out, you gotta use raw milk.
*Once thick, clabber is like a sourdough starter: shake a bit of clabber into a new jar of milk, wait a day or two until it thickens, and then repeat to infinity and beyond.

The Big Questions…
What does clabber smell like? Freaking amazeballs. Like nutty-sweet, buttery cream.
What does clabber taste like? A little tangy-tart. Needle-y bright.
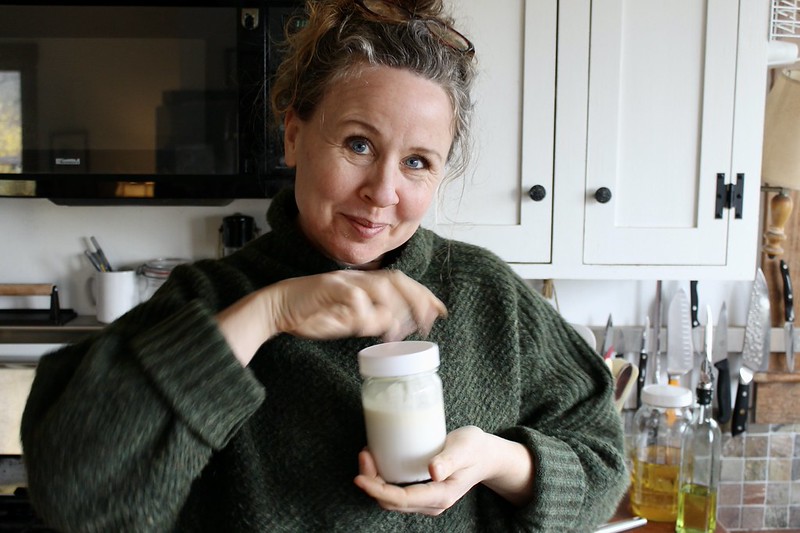
What is the texture of clabber like? Watery jello, as opposed to thick and creamy like yogurt. Cut into it and it holds its shape. Shake it up and it reverts to liquid, like a thin lassi. In some places, like South Africa, clabber is a standard beverage that’s more easily digestible for the lactose intolerant.
What’s the point of clabber? For the regular home cook, it’s like buttermilk: use it in baking or salad dressings or smoothies, or drink it straight. For the cheesemaker, it’s pure magic. A one-size-fits-all culture for cheesemaking, clabber can be used to culture any cheese — mesophilic and thermophilic — removing entirely the need for freeze-dried cultures which means that each cheese is completely unique to the cheesemaker’s location and cows. In other words, cheese cultured with clabber is ALL about the terroir.
Months ago, I made my first clabber-cultured cheese and it turned out to be one of my best yet. Nutty, sweet, and uniquely flavored, I went absolutely gah-gah over it. Since then, I’ve experimented with making and maintaining various clabbers, posted a video on it, and I’ve made a bunch more clabber-cultured cheeses (most of which I have yet to taste* but all of which are behaving and smelling most marvelously). I have been maintaining the same clabber for the last month and a half and it’s still going strong.
Actually, that’s not totally true. The other day I noticed it was smelling a little less-sweet than normal, and then I realized it was setting up in only 12 hours (because of the extra-hot weather, I think), so I started refreshing it every 12-18 hours and now it’s smelling like insanely delicious butter once again.

I’ve heard that you can keep clabber in the fridge and then take it out and get it going again — like sourdough starter — but when I tried it, the revitalized clabber never returned to its former rich, creamy state so I decided it’s better to just let it live on the counter permanently and refresh it daily. I save the discard in a jar (in the fridge) and make pancakes every few days, or else feed it to the pigs. Considering we’re drowning in milk, it’s not a big loss.

How to Make and Maintain Clabber
First, some tips…
- Use a permanent marker to write the date on the clabber jars.
- Always use a clean jar and lid.
- Don’t screw the lid on tight — a little airflow is good.
- Shake in the clabber culture and then don’t disturb (though I did take my clabber along with me on a family trip and all the jiggling in the car didn’t seem to faze it).
- Take notes so you can see how much time it takes for the milk to set up between feedings.
- Important! You must start clabber with raw milk. Once it’s set up the first time, you can switch to pasteurized milk, they say, though I’ve only ever used raw milk.
The Process…
Step 1: Put a half cup of raw milk in a clean jar, top with a lid (but don’t screw it on tight), and set the jar on the counter at room temperature. Check morning and evening by gently tipping the jar to one side. When you tip the jar and the milk stays solid, it’s set. (For a full set, you should be able to hold the jar upside down for a couple seconds before gravity pulls it down.) It will take between 2-5 days for the first set.
Step 2: Take a scoop of the clabber and plop it into a clean jar. (Toss the discard — you could probably drink it, or use it in baking, but first-set clabber has a stronger flavor.) Add some fresh milk, either raw or pasteurized. Shake. Set on the counter, with the lid loose. This time, it should set up in 24-48 hours.
Steps 3-5: Repeat step two. (In other words, use the clabber to culture fresh milk three more times.) At this point, the milk should be setting up into clabber every 24 hours. If it’s really cold/hot in your house, it may go slower/faster accordingly. The discard can be used in baking and cooking.
After Step 5(ish), the clabber will be established enough to be used in cheesemaking. To scale up for a batch of cheese, just put a small scoop of clabber in a larger jar and add as much milk as you need. There’s no need to use extra clabber to culture the larger amount of milk; one small scoop of clabber will culture a cup of milk as well as a quart (or more) of milk.
Steps 6 to Infinity and Beyond: Each day, culture a bit of fresh milk with the clabber from yesterday’s milk.
To use clabber as a culture for cheese:
- Use ¼ cup of clabber per gallon of milk. For example, if you’re making a 6-gallon cheese, you’ll need 1½ cups of clabber, so the day before, culture about a pint (2 cups) of milk.
- Shake up the clabber, and add a little milk from the pot, if you want to thin it. Where the recipe says to add your fancy, freeze-dried cultures, just pour in the thinned-down clabber and stir.
- You can use refrigerated (discard) clabber for cheesemaking, but only use clabber that’s 1-3 days old. Much older than that and it starts getting risky (though some people say 4-5 day-old clabber is fine — you decide).
- If the clabber doesn’t smell good, don’t use it!
***
*Correction! I opened one of the Camemberts today and HOLY HECK FLAVOR FIREWORKS. Clabber is The Bomb.
This same time, years previous: dairy developments, the different kinds of meals, the quotidian (4.6.20), caribbean milk cake, a trick for cooking pasta, scatteredness, the quotidian (4.6.15), the quotidian (4.6.13), cup cheese.
25 Comments
Mohinder
I have some raw goat milk in the fridge. It’s been maybe about a month? Didn’t get to it in time for drinking, then heard about clabber. Is what I have still usable?
Jennifer Jo
No, clabber is fresh milk, intentionally fermented at room temp for optimal healthy bacterial growth.
Jackie
I want to make clabber but I get my raw milk from a dairy once a week or sometims twice a week. Can I use the same milk to add to my clabber to refresh it? thanks
Jennifer Jo
Yes!
ValH
Thank you so much for mentioning “Cut into it and it holds its shape. Shake it up and it reverts to liquid, like a thin lassi.” I’m new to making clabber and I thought I was doing something wrong! It would look thick but then I’d stir it and it would become liquidy. You answered a big question for me!
If I want whey for fermenting vegetables, do I let the clabber go past the watery jello stage?
Jennifer Jo
I haven’t fermented veggies with clabber whey, but I think you could just dump the solid clabber into a cheesecloth and let it drain for an hour, similar to how you would drain yogurt (that way you’d get the whey when the clabber is at its most active), but that’s just my best guess — you might want to do a little more research elsewhere!
Dhruvi Ptl
Hello,
Love your YouTube channel! I have been binge watching your videos.
I have a question, can I use clabber to culture store bought pasteurized milk for cheese making? Have you tried it?
Thank you
Jennifer Jo
I have not done it, but I’ve read that you can, and I know people who have done it successfully. Go for it!
Priya Goel
Hello Dear my question is after leaving raw milk out on the counter and after a couple of days when it has turned into clabbered milk . Then When I strain it the curds from the whey , can I freeze the curds ? And then use the frozen curds next time to add to fresh raw milk to begin clabber culture? As I don’t have access to raw milk everyday etc..
Jennifer Jo
I haven’t heard of doing that. Clabber is at its healthiest BEFORE it has separated into curds in whey. It should be set up thick, like jello/yogurt and smooth all the way through — at that point it is the most alive. It can be refrigerated for several days before using to make cheese, but I’m not sure it would work to freeze it. You can always try, though, and see what happens!
dabney rose
Wonderful article; thank you! I’m not a cheese maker and wondering if i can just Drink my clabber? I think kefir is too aggressive for my system. So, can i just drink the discard?
thanks again Jennifer!
Dabney
Jennifer Jo
Yes, absolutely! Lots of people drink it straight or add it to smoothies.
Jacqueline
what happens if it doesn’t clabber in 2-5 days. i’ve set things out as instructed but it just stays liquidy until it suddenly turns to a chunk of curd in clear whey. Any tips?
Jennifer Jo
How many days did that take?
For some people, the milk separates into curds and whey — and that’s normal! Here’s my best educated-guess instructions: shake it up good, scoop a tablespoon into a fresh jar and proceed. My hunch is it’ll work itself out within a couple feedings.
Jennifer Jo
Here’s an instagram post that has some excellent information about clabber!
Aleksandra
Interesting! Must be why my mum’s and my quark has always been so much more delicate than the store- or farmer-bought one! We only ever let the milk curdle/set once and then we would make the quark from it. Had no idea you could strengthen it like that. Might have to experiment a bit after Easter!
Jennifer Jo
Quark has rennet, so it’s different from clabber. But last weekend I made quark by culturing the the milk with clabber (in place of the Flora Danica culture), and then adding 2 drops of rennet. It worked beautifully!
Aleksandra
Well, I used the word quark because based on pictures and the use of it in recipes it seemed the closest thing 😉 Our twaróg or biały ser (the second name means literally: white cheese) is a bit different then, because it does not need rennet.
Jennifer Jo
Oh, cool! I’m gonna look it up.
Elva
Aren’t pigs handy? If you had extra of this, it would be very good and a big treat for your chickens too!
So Mo
Could you explain how clabber is different from yogurt made at home?
I made my starter but leaving some raw milk on the counter to ferment. It set after about 14hrs (I live in very warm climate). I used a tablespoon of that to ferment more milk into yogurt. I repeat the same process every week for more yogurt. Am I making clabber or yogurt?
Jennifer Jo
Yogurt is made by heating the milk and then using ready-made starter cultures. Clabber is made by . . . doing what you’re doing!
SoMo
Oh!
If I heated the milk then added clabber culture and let it set, would I still be making clabber?
Is yogurt only made from ready made starter culture?
Polly
Obviously yogurt is not traditionally made with ‘ready made starter cultures’; that is what ferments are for! We need to get back to understanding how to make things from scratch, not GMO industry cultures.
Jennifer Jo
Yes! Good point. I should’ve said “MY yogurt is made by…”
I’ve yet to learn to make yogurt with completely natural ferments — maybe someday!