• How we beat the heat

    I already told you about strawberry daiquiris. Now it’s time to share some other creative methods.

    1. Stick your head over a fan hang-dog fashion.

    Let the wind whip through your curls.


    Quit when your eyeballs dry out.


    2. Get a shower and then lay on in the shade on the front porch and draw pictures.


    3. Pluck flowers and stick them behind your ears, in your hair, and between your lips.


    This has nothing to do with staying cool but who cares.

    4. Put a scratchy polyester lace ballroom gown over your clothes and stand over a fan.


    Do not be dismayed when young bohemians stick their heads under your billowing skirts to see your underwear, or shorts, as the case may be.

    If you are still not cool enough, stuff two rolls of toilet paper into the bodice of your gown.


    Now, even if you aren’t cool temperature-wise, you are certainly cool in the other, clearly more important sense.

    5. Sit under the fan in the cool-ish living room and read books.


    6. Close the kitchen blinds.


    7. Make up fan games, such as affixing a large hanky to the fan so that it billows madly.


    Then drop clothespins onto the hanky and watch them fly all over the room.

    8. Fill up five gallon drums with icy water and submerge.


    Get out when your fingers curl.


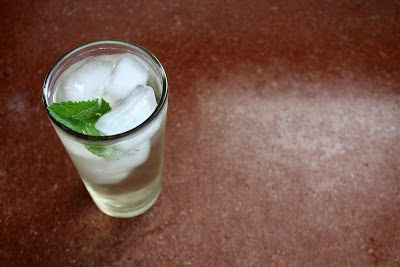
    9. Make mint tea and guzzle it frequently.

    10. Sigh happily when the sun slips over yonder mountain ridge.

    ****

    Last week was the first time I ever made a mint tea concentrate. And due to all the dire weather predictions for this summer, I have a hunch this new skill of mine will get called into service more than once.


    To make the tea, simply cut an enormous pile of mint sprigs (I used apple mint) and rinse them off in a sink full of cool water.
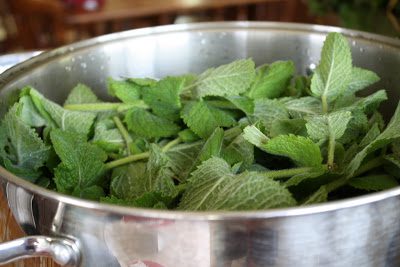

    Make a sugar syrup, pour it over the leaves, and let it steep for a goodly number of hours. Strain, add some lemon juice, and ladle the concentrate into containers and freeze. (For step-by-step instruction, see Zoe’s post.)

    This recipe makes a huge amount of concentrate—I put several quart jars of concentrate in the fridge and the rest in pint jars in the freezer.

    As for the tea itself, it is delicate and refreshing. Last night my exhausted husband guzzled a whole glass and then smacked it back down on the table hard enough to make the ice rattle.

    “This tea is perfect!” he roared.

    “Not too sweet?” I asked.

    “No way! It’s perfect!”


    Mint Tea Concentrate
    Adapted from my cousin Zoe over at Whole Eats & Whole Treats

    Zoe says that a 12-quart kettle full of leaves equals about 2 ½ pounds of mint. I didn’t weigh mine.

    I keep fretting that the tea is a little too sweet. Even after running the numbers and learning that there’s only 3 ½ tablespoons of sugar in every 2-quart pitcher of tea, I think I might cut back on the sugar next time I make it, maybe only use 2 ½ pounds instead of 3.

    Also, her recipe calls for the juice of just one lemon. I used a couple lemons and several glugs of lemon concentrate and still think the tea could stand some more acid. My husband disagrees.

    12 quart kettle stuffed full of mint sprigs
    3 pounds sugar
    1 gallon water
    juice from 1-6 lemons

    Gently rinse the mint leaves and pack them into a large clean stockpot. Put the sugar and water in a separate kettle and bring it to a boil. Pour the hot syrup over the leaves, pushing the leaves down into the syrup and then placing a heavy plate on top to keep them submerged. Put a lid on the stockpot and let the tea steep for 12-15 hours. Strain the leaves, add the lemon juice, and ladle 1 ½ cups concentrate into little plastic containers or pint jars. Freeze. (Or store in the refrigerator if using within a couple weeks.)

    To make tea: mix 1 ½ cups concentrate with 6 ½ cups cold water to make 2 quarts of tea.

    This same time, years previous: nothing is lost on the breath of God (Wayne’s death)

  • For hot summer days

    This spring weather has been wild. It’s bounced around between soaking wet, boiling hot, and extra chilly, and today it’s hovering somewhere around pleasant with a touch of gorgeous. Birds are chirping, the sun is shining, there’s a light breeze—I couldn’t ask for anything better.

    Except that I could—because the forecast for the rest of the week is like looking into an incinerator. So I guess, if my wishes counted for anything, I might ask that the rest of the week be like today.

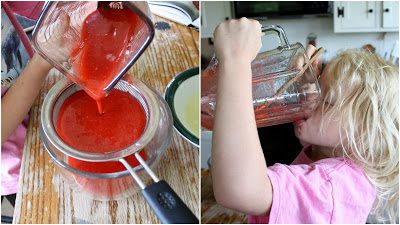
    But I’ve learned that when it comes to the meteorological weather patterns, my trite little desires have no bearing whatsoever. The most I can do is learn to cope, and this week my coping methods involve strawberry daiquiris, both virgin and non.


    I’m kind of tickled with my strawberry daiquiri discovery. The main reason, besides its outstanding refreshment capabilities, is that it makes an intense strawberry drink with a minimal amount of strawberries. Which means that if you are like me and are limping along with a paltry strawberry harvest, or have no berries of your own to harvest and so must break the piggy to buy some at your farmers’ market, this drink does an excellent job of stre-e-e-etching the berrylusciousness.


    And if that isn’t enough, the base for the drink stores well in the refrigerator, making it the perfect weapon for an addled mother or surprised hostess. Simply glug some strawberry goodness into the blender, add ice and give it a whirl, and everyone will think you’re amazing.


    And if that weren’t enough, this base can be used for more than daiquiris. Add it to lemonade, drizzle it on yogurt or ice cream, stir in some vanilla yogurt and freeze it for popsicles—the options are endless!


    If you wanna be really smart, make the base in bulk and freeze the extra for a summer full of strawberry drinks. Once you’ve done that you’ll feel so good that you’ll almost start to look forward to the 100 degree days.

    (I said “almost,” okay?)


    Strawberry Daiquiri Base
    Adapted from some place (sorry!) on the web

    Local-yocals, buy your limes at the Hispanic vendor who parks outside of T & E Meats on Fridays and Saturdays—at that little joint, limes go for six a buck.

    For simple syrup: combine 1 1/4 cups sugar in a small saucepan and add 1 cup of water. Bring the mixture to a simmer and stir until all the sugar has dissolved. Store the syrup in a pint jar in the fridge. It will keep for weeks.

    1 cup whole strawberries, washed and capped
    ½ cup simple syrup (see head note)
    1 tablespoon lemon juice
    3 tablespoons lime juice

    Combine the first three ingredients in a blender and whiz thoroughly. Press the mixture through a fine-meshed sieve. (About 1 teaspoon of seeds will get left behind—they’re bitter and deserve to be tossed.) Add the lime to the strawberry syrup and stir to combine. Refrigerate (or freeze) the base.

    For Strawberry Daiquiris:
    Put the strawberry syrup into the blender along with 3 cups of ice and ½ cup of rum. Blend until smooth. Pour into glasses and garnish with mint sprigs. Serves 3 or 4.

    For Virgin Daiquiris:
    Put the strawberry syrup into the blender along with 2 cups of ice and blend until smooth. Garnish with mint sprigs. Serves 2 or 3.

  • The best EVER

    I know I just posted a chocolate ice cream recipe less than two months ago, but oh my, this one must be written about.


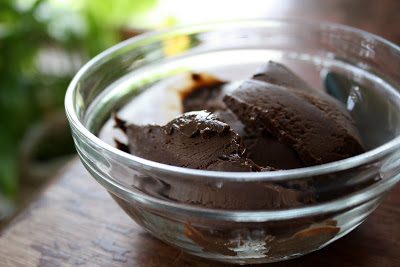
    It is The King of all chocolate ice creams. It is more svelte, more creamy, more chocolate-y, more luscious, more divine than any other chocolate ice cream PERIOD. It is THE BEST CHOCOLATE ICE CREAM EVER.

    Chocolate ice cream has never been this sexy.

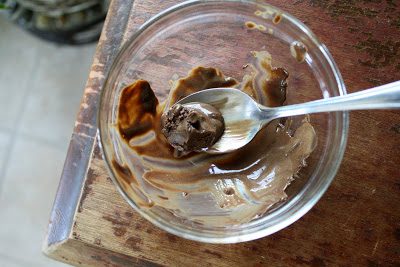
    It’s like eating a soft chocolate bar that’s cold, or so says my husband. And he’s right. This is ice cream that you can almost chew. It has substance and heft, yet it’s creamy soft.

    And it’s so rich that after eating one little scoop I feel like my eyeballs are spinning in their eye sockets like some overly-excited-yet-simultaneously-knocked-out cartoon character.


    The recipe comes via the latest Bon Appetit magazine, and I should warn you, it has some odd steps. First, it calls for a homemade caramel to be added to the base. And second, the base must sit in the fridge for two days before churning, after which it’s supposed to sit in the freezer for three more days before eating.

    A five—FIVE!—day wait? What in the world?

    Nowhere in the magazine did it explain the reasoning behind such madness, so I emailed Bon Appetit to get the whole scoop. You tell your readers that it’s important to start the ice cream five days before serving but no explanation is given, I wrote. Could you please explain the necessity of the (excruciating) wait?

    I have yet to hear back from them but surely they will answer my question somewhere, somehow, sometime? I have a hard time believing that I’m the only reader who is flummoxed.

    Flummoxation aside, the ice cream is top-of-the-line. Whether or not it’s because of the caramel syrup add-in and long wait time, I don’t know. But it’s good, so I’m not about to change things up.


    The Best Chocolate Ice Cream Ever
    Adapted from the June 2011 issue of Bon Appetit magazine

    A word about how this recipe is different from the other chocolate ice cream. The other base is like a thin pudding; this base is like a thick pudding. In fact, the base was so thick I was afraid it would burn up my ice cream maker—I turned the machine off when the ice cream was about five minutes shy of done.

    The original recipe calls for 70-75 percent chocolate. I used 53 percent and the ice cream was almost black. I can only imagine the profound intensity that 7 ounces of 75 percent would deliver.

    I used 7 egg yolks instead of 6. It was an accident (the recipe calls for 7 tablespoons of sugar and 7 ounces of chocolate, so I just assumed it was 7 yolks). It turned out delicious which leads me to believe there isn’t anything magical about the exact number of yolks. I could be wrong, of course. Tell me if I am.

    7 ounces chocolate (53-75 percent, according to your tastes)
    2 cups plus 2 tablespoons milk
    1/3 cup unsweetened cocoa powder
    6 large egg yolks
    13 tablespoons sugar, divided
    1/4 cup heavy whipping cream

    Melt the chocolate in the top of a double boiler. Set aside to cool.

    Whisk together the milk and cocoa powder in a sauce pan and bring it to a boil. Remove the pan from the heat and set aside.

    Using an electric mixer, beat the egg yolks with 7 tablespoons of sugar for about 2 minutes, or until thick and satiny. Gradually add the hot cocoa-milk mixture to the yolks, whisking steadily. Return the mixture to the saucepan and add the melted chocolate. Stir over low heat till slightly thickened, or the mixture reaches a temperature of 175 degrees. Pour the mixture into a bowl to cool.

    Put the remaining 6 tablespoons of sugar and 2 tablespoons of water in small saucepan and cook on medium high heat, swirling occasionally, until the mixture has turned a dark amber. Off heat, gradually whisk in the whipping cream (it will bubble and spit madly). When the caramel is smooth, add it to the chocolate mixture. Strain the ice cream base and put it into the fridge to chill for 2 days.

    Churn the ice cream and freeze for 3 days before eating. (Or not.)