I learned from my Aunt Valerie.

A couple years ago, three actually, because I was pregnant with The Baby Nickel at the time, we started to buy our milk from a farm. (The funny thing was, I couldn’t stand the taste or smell of raw milk because of being pregnant, so I couldn’t drink any or eat any of the yogurt or ice cream I made from it, but once the baby popped out, I was just fine. Odd, huh?)
Buying raw milk is an expensive proposition, but Mr. Handsome and I squeezed our eyes tight shut, gritted our teeth, and wrote out a check for the purchase of two shares. Then we opened our eyes and smiled. Or rather, I smiled, and Mr. Handsome grimaced—he wasn’t as in to the spending-money-on-expensive-groceries thing. We get two gallons of raw milk every week, and we also buy an extra half gallon every week and just put the cash in the little money box on the table inside the door of the milk shed. I still have to buy a gallon of milk from the store about once every week, but that’s okay.
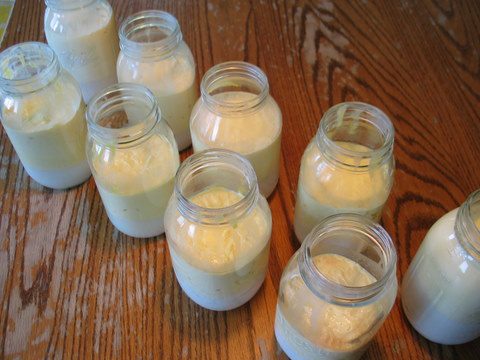
There are usually two or three inches of thick cream at the top of each milk jar which I skim off and put in smaller jars. Some goes into the refrigerator for my coffee, but most of it goes into quart jars and then into the freezer. (Only fill the jars 3/4 full because the cream expands in the freezer—if it’s filled too full, the glass will break. Trust me, I know.) I pull out a jar of cream when we get the urge to make homemade ice cream, but usually the jars just sit in there. Once I have a stockpile of frozen cream, about 8-12 jars, then it’s time to make butter.
I remove the jars from the freezer, take their lids off, set the jars on my back hall counter, and cover them with a clean cloth.
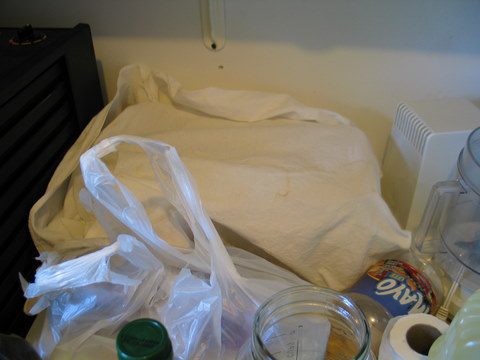
Allow the jars to sit there for two or three days to ripen; the cream turns into butter faster when the cream has had time to age first.
(I make a sour butter, one that is not good for eating fresh, but is very good for baking—in a recipe I’ll usually use half bought butter and half homemade. If you would like to make butter for fresh eating, use fresh cream and do not culture it.)
On butter-making day, using my meat baster tube thing, I suction out the milk that is sitting on the bottom of the jars and squirt it into a big bowl. Even though I only put cream in the jars, the cream still rises, leaving some milk at the bottom. By omitting the extra milk, I can fit more cream in my churn and get the whole process done faster.
I dump three or four jars of cream, depending on how full they are, into my butter churn, gifted to me by the very generous Grand Matriarch, screw the lid on tight, put a towel on the floor, snag a kid, and order them to start cranking. I set the timer for five or ten minutes per kid and they rotate through, doing their part.

Now, if you do not have a butter churn, you can still make butter by using a blender. Actually, that is how my Aunt Valerie taught me. You simply whirl the cream in the blender, with the lid off and while stirring the top part gently with a wooden spoon (if you dip the wood spoon in to the blender too far then you will get butter with wood chips—not a good idea at all).

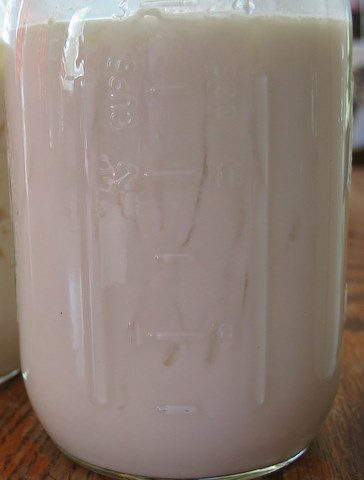
Once the butter has come, I pour off the buttermilk into the same big bowl into which I had squirted the bottom milk and dump the butter into a second bowl.

This buttermilk is pure golden, so don’t you dare throw it out—it’s my favorite part of butter-making. To culture the buttermilk, I fill clean quart jars 3/4 of the way full (they will eventually go in the freezer) and, leaving the lids off, I set them on the counter in the back hall, covered with a clean cloth, and let them ripen for a couple more days. I know it has cultured when the buttermilk is solid, like yogurt, and I can see little holes and cracks in the buttermilk in the sides of the jars. (You can use the buttermilk without culturing it first, but I think cultured buttermilk adds more depth and pizazz to baked good. Whatever that means.)
Then I put lids on the jars, label and date them, and pop them in the freezer. I use my buttermilk mostly for pancakes and waffles (it makes them light and sky-high fluffy), but not for salad dressings or drinks—the flavor is too strong for that, I think.
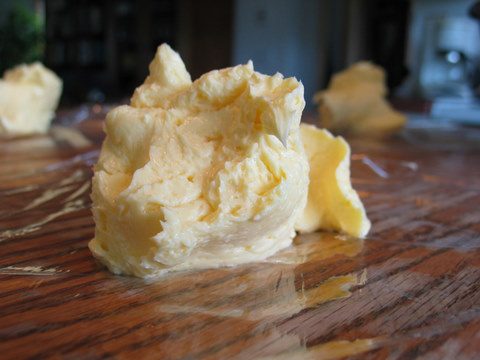
When the churning process is complete and I have a big bowl of butter, then it’s time to wash it.

I do this by setting the bowl in the sink and letting cold water run into the bowl while at the same time using my hand to press and turn the butter, pushing out the last drops of buttermilk.

Once the water runs off clear, no longer white and milky, I push out the last of the water. Then I add a couple teaspoons of salt and knead it in to the butter. This turned out to be about two pounds of butter, but I didn’t know that then. I just eyeballed it, aiming for about a teaspoon per pound.
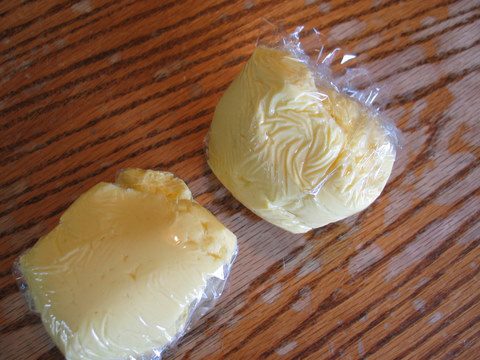
I measure the butter using a half-cup measure (equals one stick of store-bought butter, see?) and place the measured blobs on pieces of plastic wrap.

I wrap the butters up, put them in a bowl, and set the bowl in the fridge.
After several days, I put the butters in a plastic bag and move them to the freezer.


10 Comments
Therease A Hahn
Just found your blog. Enjoying it! Thanks.
Anonymous
I don't have ANY luck with pasteurized milk when I make butter. Need to have raw unpasteurized milk. A Must!!! and if you want to have any nutrients at all.
Anonymous
Raw milk is not pasteurized. Some people with milk allergies can drink raw milk, because of the enzymes present that help with digestion. It doesn't last as long as pasteurized milk, but unlike pasteurized milk, when it starts to turn, it isn't rotten, just "sour." Still good for baking, or butter, or whatever. I've heard lots of other claims about health benefits too, but not sure which are legit. As long as the milk is just pasteurized, but not ultra-pasteurized or homogenized, you can still use the cream to make butter.
Anonymous
Is the raw mild pasteurized? Remember TB? What is the reason for raw milk? I remember getting milk from the milk-man (yes, I'm that old) it had cream that rose to the top but I'm positive it was pasteurized.
Madsdriscoll
Mom’s been making, or trying to make butter a lot. It involves getting the cream at room temperature and shaking for hours. And even then it doesn’t turn into butter.sometimes she gets so mad she yells at it. She should read this. It would help a lot.
Mads
James W.
Another tip for making butter. 63 degrees is the perfect temperature for the cream. The finished butter is firm and easily separated from the buttermilk. Also it washes more easily.
-Valerie
Jennifer Jo
Zoe, I use half and half because the homemade butter is stronger flavored and I’m a little paranoid that the sour flavor would come through. I’m just cautious, quite possibly overly so.
Val, I thought that the salt might help with the preservation of the butter. No? If that’s not the case, then I guess I can drop that step. Thanks!
James W.
Your churn is great. What a lovely kid job!
Save yourself a step. Why bother with the salt (I only use 1/2t per lb. if I do salt it)? Most of my Cooks Illustrated recipes call for unsalted butter anyway.
-Aunt Valerie
You Can Call Me Jane
Just beautiful!
g
Zoë
Mmm, I love making butter. Makes me feel very old-fashioned, except that I do the blender thing and that’s not too old-fashioned.
Why do you only use half homemade butter for baking? I always use all homemade, though not if I’m doing fancy baking, like those little Angel Whisper cookies my mom makes.