• Summertime Supper

    The blueberries are done, the wax cherries and some apricots are in the dehydrator, the apricot jam is in jars on the counter (and pushed way back from the edge, uh-huh), the sweet cherry jam is cooling on the counter (also pushed waaaay back). There are still more cherries and more apricots to put up. My hands look a little rough (the fingertips are cracked and stained brown, and my nails are black-ish and gross), but that doesn’t faze me (though the kink in my back is a bit bothersome)—I enjoy dappling in a rainbow of color: blood red, dark blue, and golden orange. Makes me feel filthy rich to have this much fruit piled on my kitchen counters, clogging up my fridge, laying on my bedroom floor (the apricots), and stashed in the freezer in bags and jars.

    For the first time, some of the apricots are coming from our own trees. Not many, mind you, but enough to make me feel a wee bit proud.


    With all this fruit on hand I didn’t have much choice but to make cobbler. So I made one. And then I made another.


    The first one was an apricot-blueberry cobbler, with a smattering of red raspberries from the garden. The second was a rhubarb-sweet cherry with leftover canned strawberry juice in place of the water (I liked this one best).

    I played around with the batter and after a series of phone conferences with my Aunt Valerie up in Pennsylvania and a consultation with The Mennonite Community Cookbook, I came up with my own little recipe.

    This cobbler is not exotic, but it’s simple and good, the perfect way to use up summer fruit. A bonus is that it doesn’t take much time—something that’s quite important when you’re up to your eyeballs in fruit. It was tonight’s supper, warm, with milk poured on top (and side dishes of leftover baked oatmeal, a cream sauce I was experimenting with, and a sour cherry sauce—cleaning out the fridge cause I gotta have room for all those sweet cherries whose fat cheeks have yet to be squeezed).

    Fruit Cobber
    Adapted from The Mennonite Community Cookbook and from the recipe that my Aunt Valerie dictated to me over the phone


    For the fruit mixture:

    5 cups prepared fruit (apricots pitted and cut in chunks, cherries pitted, apples peeled, cored, and sliced, and so forth)
    ½ cup sugar (or more if you are using tart fruits, such as sour cherries and rhubarb)
    1 ½ tablespoons minute tapioca
    3/4 cup fruit juice or water (if you are using bland fruits like sweet cherries, blueberries, apricots, add a couple teaspoons of lemon juice)

    Heat the oven to 375 degrees. Put the prepared fruit in a 9×13 pan. Sprinkle the sugar and tapioca over the fruit, then pour the juice (or water) over it all. Stir gently. Slip the pan into the hot oven, and while you wait for it to bubble, mix up the dough.

    For the dough:

    2 1/4 cup flour
    3 teaspoons baking powder
    3/4 teaspoon salt
    ½ cup sugar
    2 eggs, beaten
    ½ cup, plus 1 tablespoon, milk
    6 tablespoons butter, melted

    Whisk the dry ingredients together and then add the wet ingredients.

    Pull the bubbling fruit out of the oven and dollop spoonfuls of dough over the top, about twelve or so little mounds. Bake for 15 to 20 minutes or until the biscuits are set—use a fork to pry two biscuits apart and peek inside to see if the batter is fully baked.

    Allow the cobbler to cool for 30 minutes. Serve with milk for a main course or vanilla ice cream for a dessert.

  • My Morning

    I attacked the blueberries, putting them into the freezer, mashing some up with sugar to make a fruit sauce, mixing up a batch of freezer jam. Yesterday I had put a large load of berries in the food dehydrator, so I had to spend a good deal of time picking out the berries that were drying faster (next time I will sort them by size before drying them). While I was working on the dried berries in the back hall,


    I called my girlfriend Amber to ask her how I should do up the sweet cherries. We were chatting away when I heard a crash and the disturbing sound of glass shattering.


    This is the imp that did it.


    Now I have only three jars of jam left. Sigh.

  • How I Make It

    I taught myself how to make yogurt about ten years ago when Mr. Handsome and I were living in Nicaragua. There the cows were so skinny that there was no cream in the milk, but I was still able, somehow to make thick, creamy yogurt (quite possibly it was because of the lack of sanitation and consequently the abundance of bacteria). Incubating the milk was a cinch—just four hours in a thermos.

    When we came back to the States, I had to refigure everything. The milk was pasturized and the little cups of yogurt that I bought from the store to use as starter didn’t seem to have the same kick. A thermos didn’t work anymore, either, for whatever reason.

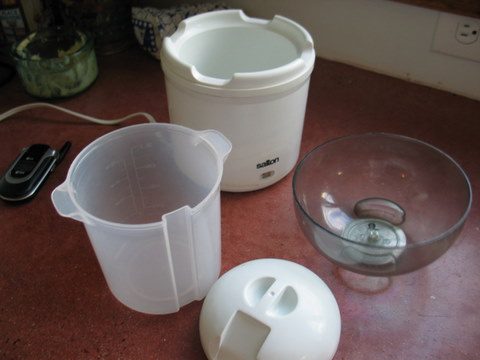
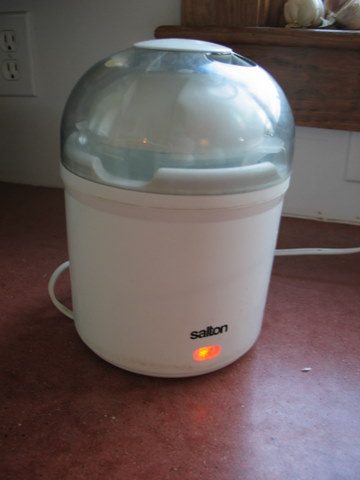
    I finally bought a yogurt maker, a Salton.


    I experimented with different plain yogurts and discovered that Dannon’s plain yogurt worked well. The resulting yogurt was runnier then what we had in Nicaragua, but it would do.

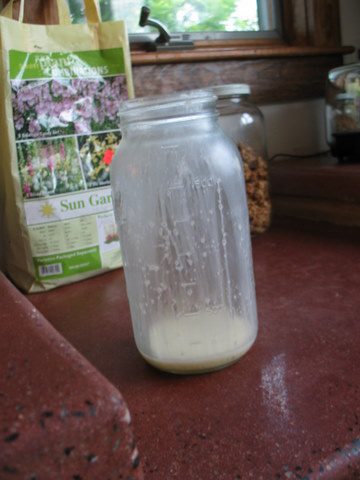
    For the past several years we have been buying raw milk from a farm


    and the yogurt is thicker—bacteria is good, you know.

    Mama JJ’s Yogurt

    If you are buying your milk from a store, make sure it is not ultra-pasteurized. Also, the more local the milk is, the better it works; I haven’t had much luck with the generic store-brand milk. I prefer 2 % milk, or even whole, but skim will work fine, too. If you are using raw milk, just partially skim it.

    Powdered yogurt starter can be bought from a number of places, including the Lehman’s catalog and New England Cheesemaking Supply Company, but I think the store-bought plain yogurts, like Dannon and Stoneyfield, are good enough. The key is to use the less-processed yogurts, the ones that don’t have all the blessed bacteria zapped out of them. In subsequent batches, you can just use your own yogurt as starter for the next batch. Once your yogurt is established, you only need about 1/4 cup of yogurt to start a new batch. You don’t need to get a new starter unless your yogurt becomes contaminated and starts to taste funny—I haven’t used a new starter in a long, long time, maybe a year.

    4 cups milk
    ½ cup plain yogurt

    1. Pour four cups of milk into a saucepan. Heat it on medium high heat until it’s steaming and a skim has formed on top. Do not let it boil. (If it does, don’t worry. It should still work. You just don’t want to make a habit of it, mostly because it makes a horrific mess and you won’t want to do a deep clean of your stove every time you make yogurt.)


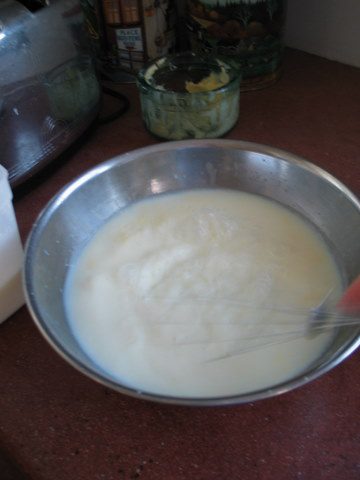
    2. Pour the hot milk into a bowl to cool.


    3. Plug your yogurt maker in so that it can warm up.


    4. When the milk has cooled to lukewarm (I just test it with my finger, but if you’re using a thermometer, the milk should be about 110-120 degrees, though I have heard that it can be as high as 130 degrees), add the starter yogurt and whisk vigorously.


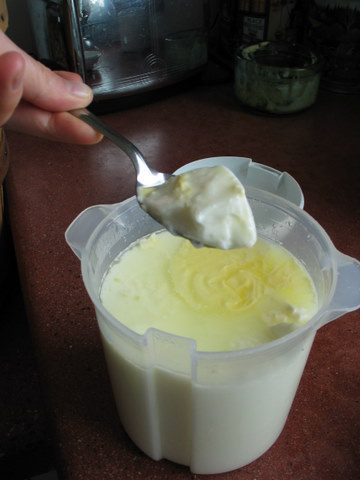
    5. Pour the mixture into the incubator and let it sit for 4-8 hours, or until firmly set (some yellowish whey may be floating around on top—that’s normal). The yogurt becomes more acidic the longer it is in the incubator, so you want to get it out as soon as it has set.


    6. Put the container of yogurt directly into the fridge (not the whole incubator, of course, just the container which holds the yogurt) and let it set, undisturbed for 12 hours, or overnight. Before transferring it to a new container, gently pour off and discard any whey that has risen to the top.


    When you are ready to eat it, scoop out what you need, plop it into a bowl, add your sweetener (jams, fruit sauces, honey, etc), and enjoy.


    Don’t forget to save a quarter cup to start your next batch.

    Note: Click here for a creamier yogurt.