• Under the right circumstances

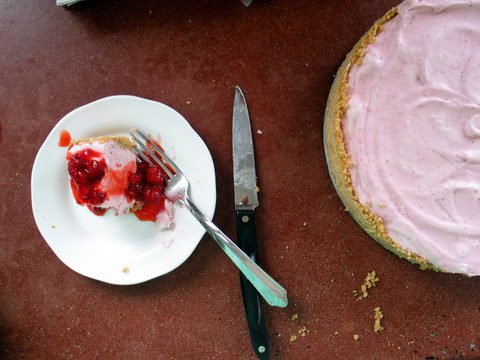
    I told you I would post about this Strawberry Margarita Pie, and now I wish I hadn’t promised that because I have other, more pressing things (chicken, cherries, and cheese—but I’m not making any promises), to write about. However, a promise is a promise, so here’s the pie, coming at you.


    This pie (more a cake, in my mind) is not something I’m going to whip up all that often, and that’s possibly the reason I’m dragging my feet when it comes to giving you the recipe. It’s not that I don’t like the cake; on the contrary, I think it is delicious. It’s just that it’s not a very practical recipe: my kids can’t eat it (though they beg for bites) and many of my friends and family don’t like the taste of alcohol. Also, it’s not the type of thing that you want to eat with an afternoon cup of coffee, so I don’t get around to eating it, choosing instead to eat pastry-type goodies (like those white chocolate and dried cherry scones) with my coffee.


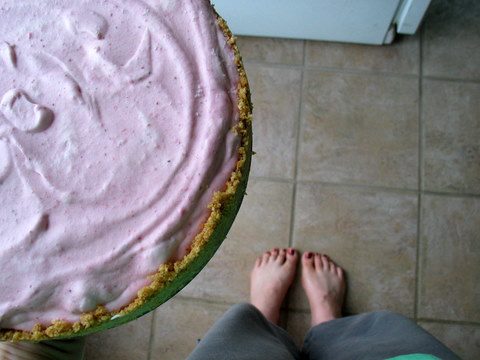
    So, under what circumstances would a person like me want to make this cake? It would be perfect for a summer evening gathering of giggling girlfriends because, after all, it’s pink.


    Strawberry Margarita Cake
    Adapted from Cookie Baker Lynn‘s blog

    No baking is involved—a plus for a summertime dessert.

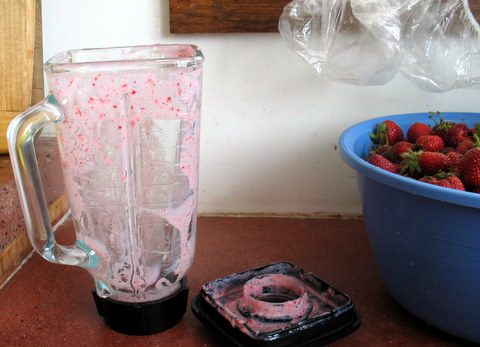
    I make my graham cracker crumbs by blending the crackers, a few at a time, in the blender.

    The alcohol flavors are not disguised in any way, so if you don’t like alcohol, this will not be your thing. But the opposite is also true: If you like alcohol, then you will most certainly adore this cake.


    2 cups strawberries, washed, hulled, and sliced
    10 tablespoons sugar, divided
    1 3/4 cups graham cracker crumbs
    ½ cup butter, melted
    3/4 cup sweetened condensed milk
    7 tablespoons tequila
    6 tablespoons Triple Sec
    1 tablespoon lime juice
    2 cups whipping cream
    More sliced and sweetened berries and sweetened whipped cream, for garnish (optional)

    For the crust:
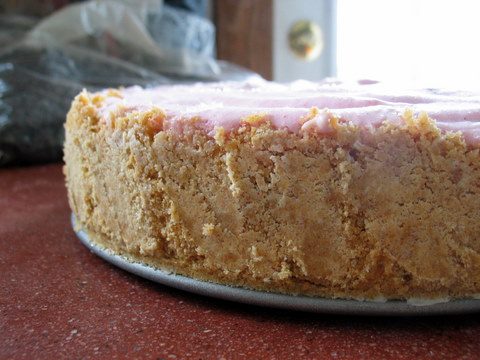
    Stir together the graham cracker crumbs, the melted butter and 6 tablespoons of the sugar. Press the crumbs into the bottom and up the sides of a greased, 9-inch springform pan.

    For the filling:
    Whip the cream until it forms stiff peaks. Set aside.

    Put the strawberries, remaining 4 tablespoons of sugar, the milk, liquors, and lime juice in a blender and blend until combined.


    Pour the strawberry mixture into a mixing bowl and beat in one-third of the whipped cream. Once combined, whisk in the remaining whipped cream. Pour the filling into the crust, cover well with plastic wrap, and freeze till solid.

    To serve:
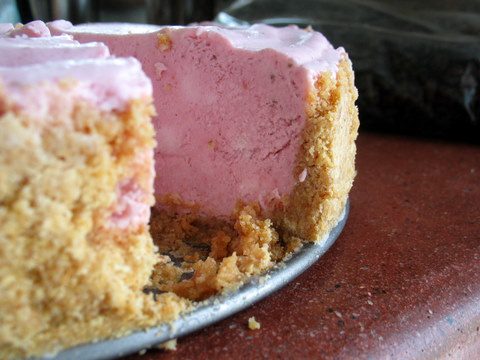
    Run a knife around the edges of the pan and remove the side. Serve each slice of cake with sweetened sliced strawberries and extra whipped cream.

    Yield: 8-16 servings, depending on how you hold your liquor.

  • Staying on track

    You guys hold such power over me. You know that, right? It’s like I’m a puppy on a chain, and you hold the other end. Sometimes you yank my chain just to see me bark. Other times you tie me up to a tree and walk off, leaving me alone to howl at the moon. Sometimes you relax your grip, content to let me take you for a zig-zaggy hike through the bunny trail-infested woods, and other times you take a firm grip on the chain and strike out on a path of your own choosing, expecting that I’ll trot along faithfully at your heels, which I do, wiggly-waggly hindquarters, puppy dog eyes, and all.

    Zoe grabbed hold of my chain this morning when she asked how I freeze spinach. I was going to talk about something else, but well, once my tail commenced to thumping, I (almost) totally forgot what I was going to say.


    I had planned to tell you about freezing spinach, like four weeks ago. In fact, I had taken pictures of the whole process, but then I decided not to write about it after all. Another bunny must have run in front of my snuffling nose.

    Thanks, Zoe, for getting me back on track.

    How to Freeze Spinach

    Wash the spinach, and lay it out on a bath towel to air dry. There is no need to get it totally dry; you are going to steam it, after all.

    Steam the spinach. I do this by putting about an inch of water in my steamer, keeping the water below the level of the spinach because I don’t want to boil the spinach. I then stuff the steamer with as much spinach as possible.


    I clap the lid on the steamer and let it steam till the spinach is bright green and wilted (once in a while I gently toss the spinach with a pair of tongs so that it steams evenly).


    Transfer the spinach to a colander and allow to drip-drain.

    Now, my mother taught me to lay the spinach out, piece by piece, on cookie sheets lined with plastic wrap, repeating the process till I had two or three layers of spinach, each layer separated with a sheet of plastic wrap, and up until this spring this was how I froze my spinach (although the last time I did this I made the mistake of using wax paper instead of plastic wrap and the spinach froze to the paper and I had a dreadful mess on my hands).


    Then I would put the trays of spinach in the freezer until the spinach was frozen solid, and once the spinach was frozen (it took about an hour), I quickly transferred the stiff leaves into pint-sized plastic bags.


    But then Mr. Handsome walked into the kitchen while I was painstakingly putting the individual leaves of spinach into bags and asked, “Why do you lay the spinach out like that? Why don’t you just stick it into a bag?” I didn’t know. So I called mom and asked her, and she didn’t know. So I called my girlfriend Amber and she said that she just freezes it in 10-ounce portions since that’s how it’s sold in the store and that’s the amount that most recipes call for. So now I do it Amber’s way. It’s easier and it takes up less freezer space, too.

    I realize there’s more than once way to slice an onion, so … how do you freeze spinach?

    (Click here to learn how I freeze Swiss chard.)

  • Tweaking my methods

    I haven’t written about sourdough bread in for forever, I know. It’s not that I’m not making bread, because I am. It’s just that I’ve said pretty much all I want to say about it. I’m fairly stable in my bread-baking routines, and stability is boring when it comes to writing.


    My bread-baking routine is as follows. About once a month I get my starter out of the fridge and feed it for a day. The next day I bake two loaves, and I double the amount of starter so that the following day I have enough starter to bake six loaves. Depending on our need, freezing space, and my schedule, I may bake another six loaves on day three, or I may make bagels or some other specialty bread. Then the starter goes back into the fridge and I forget about it for several weeks.

    Despite the lack of creativity, I do tweak my methods once in a while. I’ve read about all different kinds of sourdoughs and all different baking methods, and what I’ve learned has led me to suspect that sourdough bread is very forgiving and that rigorous schedules needn’t be followed to the letter in order to make good bread. So this last time I baked, I decided to shake my system up a bit and try something new. I mixed up a batch of country white bread (with some whole wheat thrown in), but instead of proofing it in the fridge overnight, I let it rest in the fridge for only a couple hours before pulling it out and allowing it to proof at room temperature for another couple hours before baking. It turned out lovely—sourdough bread in one day.

    I’m not going to be updating this blog much anymore (that probably goes without saying), choosing instead to pour all my energies into the main blog, but I’m leaving this up as a resource. Which is all it really is anyway.

    Happy baking!