I don’t know how those kitchen-tester, experimenter-type people do it. You know who I’m talking about, right? I’m talking about the cooks that are behind the scenes of cookbooks and culinary magazines, but specifically (for the next few paragraphs anyways) about those people who work for the magazine Cook’s Illustrated. Those Dudes and Dudettes slave away in the magazine’s test kitchen for hours at a time tweaking and tasting and tasting and tweaking till they find The Perfect Whatever It Is They Are Searching For. And then they tell you what they’ve learned.
No, that’s not quite right. They tell you every little detail of how they learned what they learned, so that you can be sure to appreciate the fact—the fact!—that they have fairly outdone themselves bringing you The Best There Is. They try to be generous and gracious, but you can’t help but hear their behind-the-scenes self-righteous sniffing.
You’re not familiar with the magazine? Okay, let’s take, for example, the question of prepeeled garlic. You didn’t know there was a question about prepeeled garlic? Well, there is, or rather, there was. See, somebody (the editor, perhaps?) wondered what the difference was, if any, between jarred, prechopped garlic and fresh garlic. The question (probably written in beautiful calligraphy on a parchment scroll and bound with a satin ribbon) was delivered (by a thirteen-year-old boy in purple tights) to the Dudes and Dudettes in the magazine’s kitchen. Of course the D and D’s didn’t do a simple taste test, oh no-no-no-no-no! They, the dear souls, got down and dirty in their quest to answer the all-important question set forth before them. As a stringed quartet played Vivaldi over in the corner by the industrial stoves, they spun and twirled around the kitchen making aioli sauce (two batches, of course), sauteed garlic with spaghetti (again, two batches), and stuffed rolled flank steaks (yep, two batches). The tasters (seated in a red-carpeted dinning room) gave mixed reviews, and the final verdict (written on another, slightly larger scroll) stated that prechopped garlic would not store as well as the fresh raw cloves, but that there was not much difference in taste (and with that, the music soared gloriously, and the kitchen staff bowed and curtseyed as we gratefully applauded). The end.
Um, hello? I’m pretty sure I already knew that fresh garlic lasts longer than the prechopped stuff (though I never thought to thunk it), and I can guarantee that it didn’t take multiple batches of flank steak and spaghetti for me to figure that out. (That I don’t even know how to cook flank steak is irrelevant.) However, I do understand that documented—and published!—scientific evidence is worth more than my practical, day-in-and-day-out kitchen wisdom. And so I bow my head in meek submission.
Okay, okay. I’ll stop now. The magazine does hold helpful information (I did check it out of the library, after all), and I enjoy flipping through its pages, gleaning tidbits. But there is something off-putting about the magazine, not because they have a goal to obtain the perfect Whatever It Is because all cooks strive for this, but because they claim that they have. Cooking is such a personal thing and everyone has different preferences, so for them to assume that they hold the Golden Answer strikes me as being a little presumptuous.
But maybe that’s just because I can’t stand to see anyone else carting around more than their fair share of the gold.
Anyway, my point to all this was that just thinking of all that excessive food prepping and testing makes me bone weary. (And besides, who eats all that food? I worry over things like that; I can’t help myself.) As for me, I’m feeling pretty whipped after playing around with a raspberry-lemon buttermilk cake, doing my darndest to grab hold of some of that flashy culinary gold. I made it three times. Three times is about all I can handle, so it’s a pretty good thing that I struck pay dirt on the third try. Or maybe I just gave up and decided it was easier to be content.
I unwittingly started my cake marathon when I made Deb’s Raspberry Buttermilk Cake. To start with, I only made a couple practical changes—I doubled it, and I used frozen raspberries instead of the fresh, plus, I sprinkled one cake with plain white sugar and the other pan with Demerara sugar. Some daring changes, huh? But then we tasted it and Mr. Handsome thought it needed more lemon, so back to the drawling board I went. (And right there is when I started hearing little Cook’s Illustrated voices in my head: “I’m going to make this cake perfect, I tell you, simply perfect.”)
The second time around I reduced the buttermilk by a quarter cup and added a quarter cup of fresh lemon juice instead. I also upped the lemon zest, three times over. The resulting cake was definitely more lemony, but all the berries sank to the bottom and the cake had a more sponge-like texture. (“Drat this cake! Don’t tell me I’m going to have to do something crazy like beat the egg whites. This is supposed to be a simple cake. A simply perfect cake.”)

Round three involved two parts buttermilk, one part yogurt and one part milk (because I ran out of buttermilk, not because I was intentionally trying to be complex), no lemon juice, three-plus times the amount of zest, and fresh berries because they are now in season and I had just picked a bowlful.
I pulled the cake from the oven. I looked at it. I sniffed it. I tasted it. And then I smiled.

And now (drum roll, please) I present you with, a la The Cook’s Illustrated Testing Method (sniff, sniff), the perfect, absolutely perfect, Raspberry-Lemon Buttermilk Cake.

Actually, I think this cake would also be good as muffins, maybe with a layer of streusel hidden in their middles, or with blueberries in place of the raspberries (blueberries and lemon, oh my). See, I’m not really Cook’s Illustrated material—there’s just too many good options out there. Besides, I haven’t the endurance or the ego.
Well, it might just be the endurance part I’m missing.
Seriously, though, this cake is good. It’s simple and elegant, but not too showy. It’s just the thing to have on hand, like at all times. (I tried serving the cake with seedless raspberry sauce and some whipped cream, but I think I like it just as well, and maybe better, all by itself. Sweet and simple, and perfect. Sniff.)

Raspberry-Lemon Buttermilk Cake
Adapted from Smitten Kitchen
Deb’s recipe made one round, 9-inch cake, but I doubled it. The way I see it, if you’re going to go to all the trouble to measure, mix, and bake you might as well make a fair amount. Besides, the cake freezes well, so I doubt you’ll regret the extra (we whipped through the six cakes I made in less than a week). But if you’re feeling conservative, go ahead and halve the recipe. It will still be sniffably perfect.
2 cups flour
1 teaspoon baking powder
1 teaspoon baking soda
½ teaspoon salt
½ cup butter
1 1/3 cups sugar, plus 3 tablespoons for sprinkling
1 teaspoon vanilla
the zest from one lemon, or a minimum of 3 ample teaspoons
2 eggs
1 cup buttermilk (or ½ cup buttermilk, 1/4 cup plain yogurt, and 1/4 cup milk)
2 cups raspberries, fresh or frozen
Grease two 9-inch cake pans and line them with wax paper circles. (To make my wax paper circles, I set the cake pan on the wax paper, trace around it with a pencil, and then cut out the circle and press it into the bottom of the greased pan.)
Cream together the sugar and butter. Add the vanilla, eggs, and zest and beat some more.
Measure the dry ingredients into a separate bowl.
Add the dry ingredients to the creamed butter alternately with the buttermilk.
Divide the batter between the two pans. Sprinkle the raspberries evenly over the cakes, and then sprinkle over the sugar.
Bake the cakes at 400 degrees for 15-20 minutes. Allow them to cool for ten minutes before inverting the cakes onto a cooling rack and peeling off the wax paper. To freeze, wait till they have cooled to room temperature before wrapping well in plastic wrap and transferring to the freezer.
One year ago: Angel Bread.


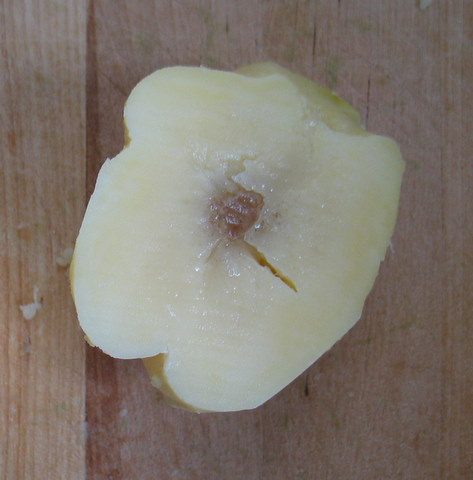 And in the same potato-y vein: Why is it that when I boil my potatoes, the outsides stay firm while the very centers tend to get a bit mushy-slimy? Does it have anything to do with the fact that I test the potatoes for doneness with a fork—do the fork marks allow for the boiling water to enter and sog up my potatoes’ insides?