• Crunchy and sweet

    Sunday afternoon, Francie, our 60-plus pound lab, had a head-on collision with my kneecap. She was running at top speeds—until suddenly she wasn’t. And I was spinning around like a top, clutching my leg and feeling tingly cold and burny hot all over. I didn’t want to look down for fear my kneecap had fallen into my sock. It was just a bruise, however, and not even a very big one at that, but three days later I’m still sore.

    Then the next night, the Baby Nickel belly-kissed the stove. It was the weirdest thing. He was warming up by the wood stove after his bath, tired and grumpy after a long day and no nap. He asked Mr. Handsome to help him get dressed, and Mr. Handsome, busy on finances, told him no, Dress your own self, boy. The Baby Nickel turned bratty and demanding, hollering at the top of his lungs that he must be helped right that very minute. So Mr. Handsome helped him by relocating him to a timeout in the downstairs bedroom. Nickel was mad as a hornet.

    Eventually he turned weepy-sad, and Mr. Handsome paid him a visit. But Nickel refused to work things out, sobbing that he wanted Mama. However, I was busy. So the girls took turns checking on him, trying to cheer him up. All to no avail. The poor kid was exhausted.

    After he had been in the room for a good twenty minutes, I finally went in to see him. He was curled up on the sofa, still naked, tears streaming down his face. I told him to sit up (couldn’t very well hug him while he was fused to the cushions), and as he slowly, shakily, sat up, I caught a glimpse of some scratch marks on his belly. Then—oh my word! “John! Come here!”

    There were burns on his tummy, one big, one tiny, but both puffy-angry.

    It was freaky, I tell you. A burn that big and he never said a word? Never even cried his hurt cry?

    We quizzed him and gradually learned that a) no, no one had pushed him against the stove, he had just gotten too close; b) yes, it hurt; and c) no, he didn’t know why he didn’t tell us. (And no, we don’t think he was afraid to tell us—he’s not that kind of kid.)

    “Which hurt worse?” I asked. “The burn you got on your finger or this one?”

    “This one,” he said.

    Well, okay. At least he correctly identified the worse burn, pain-wise. Because I was beginning to wonder if he was missing some nerve endings.

    In retrospect, I think he was not fully aware of what had happened—it’s the only explanation I can come up with.

    Normally I don’t feel too bad when my kids get hurt. I don’t take responsibility for their bumps and ouchies.

    You fell down? Well, shoot! Get back up!

    The chicken pecked your hand? Don’t put your hand in front of its face then, silly.

    You fell out of your chair and landed smack on your back? Well, if you’d minded your manners and kept your butt on your seat, you probably wouldn’t be lying there crying right now.

    Your sister whacked you? Don’t provoke her. (Dummy.)

    But this time I felt awful. A burn that bad? If it were me, I would be having histrionics, calling up all my friends in a quest for sympathy. I had a little burn on my thumb the other day and it hurt. I yelled and my eyes watered, and then I had to keep working around the heat (didn’t want the food to burn, too) and lost half the enamel on my teeth from gritting them so hard.

    Maybe tummies and thumbs feel pain differently? Maybe I’m a wimp and the Baby Nickel is stoic? Maybe I should change his blog name to (deep, gravely voice) The Bruiser.

    After Mr. Handsome and I got done staring and grilling him (sorry, bad pun), we snapped shut our slack jaws and started oozing some serious sweetness. We helped him into his jammies, gave him Tylenol, and applied medicine and a loose bandage. In short order, he was all teary-eyed smiles and cuddles (though he refused an offer to be carried up to bed, preferring to walk himself, both hands holding his shirt away from his wound).


    By the next morning an outsider would never have known he was burned. He even wore blue jeans. Ouch.

    But enough of that. I’m sure you’re dying to learn how I, Miss Wimpy, got burned.
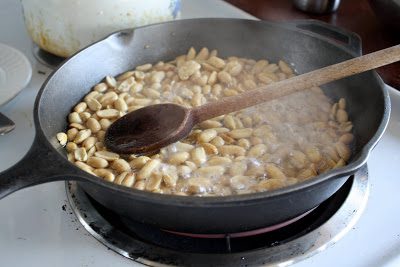

    It was while making my second batch of candied peanuts, one of my latest passions. One of the super-hot candied peanuts jumped out of the pan, and in a classic dumb cook move, I used my fingers (stupid stupid stupid) to pick it up and toss it back in. What followed, the desperate effort to pry off the hardened sugar-syrup with my teeth, the yowls and wails, was to be expected. The bigger surprise was that I, a cook who has never successfully made candied nuts (aside from cashew brittle), had hit a home run for the second time in a row.


    Crunchy-sweet and mildly salty, these nuts are the way to go. Over the past couple weeks, and with only minimal help from the members of my immediate family, I’ve managed to tear through two whole pounds. The funny thing is, the kids love them but Mr. Handsome doesn’t. I’m not sure why, and I don’t even really care. It’s his loss.

    So far I’ve made these nuts plain, with just sugar, water, and salt. The second time around I added some ground cinnamon which was lovely, though I wish I’d added more. I’m already making plans for the next batch: ground cinnamon and chipotle powder.


    Candied Peanuts
    Adapted from David Lebovitz’s blog

    Feeling timid, I used only a couple small pinches of cinnamon. Next time I’ll use at least a quarter teaspoon.

    Other nuts can be used, though I have yet to try them. Smooth ones are best, says David, for coatability. So if you want to experiment, try whole almonds, macadamias, or cashews.

    2 cups raw peanuts, unsalted and untoasted
    1 cup sugar
    1/3 cup water
    1/4 – ½ teaspoon flaky salt
    optional: cinnamon, chili powder, chipotle powder, smoked salt, etc.

    Dump the peanuts, sugar, and water in a cast-iron skillet or heavy-bottomed saucepan. Crank the heat up and start stirring.
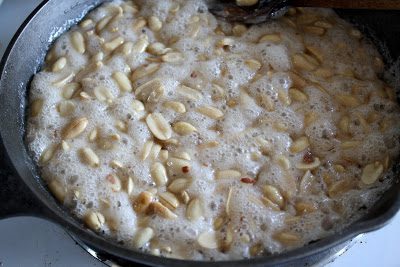

    The sugar and water will make a nice syrup, but all the time the water will be evaporating.
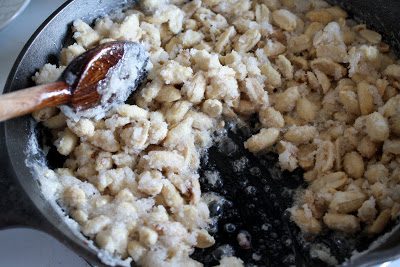

    Quite suddenly, the sugar-water will turn to sugar-sand. Reduce the heat to medium and lift the pan off the burner to help it cool a bit. Stir constantly.

    Alternate between setting the pan on the burner and taking it off—if the nuts are browning too quickly, take it off; not enough color, put it back on. The goal is to get them a nice golden brown, as dark as you can without scorching.

    If a nut jumps out of the pan DO NOT PICK IT UP.

    Soon after the sugar turns to sand, a little syrup will start to form on the bottom of the pan. Stir frantically, trying to coat all the nuts with that syrup. With about a minute of stove-time left, sprinkle in your salt and any other spices. (It’s good to have them pre-measured because at that point you’ll be moving really, really fast.)

    When you can no longer keep the nuts in the pan without them burning, dump them onto an ungreased cookie sheet. Let them rest for 5-10 minutes before breaking them up into pieces. Let them cool all the way before storing in a glass jar.

    Yield: a scant quart (if you don’t snitch any while they’re cooling)

    This same time, years previous: chicken butchering

  • Not just any bread

    In our house, twenty eleven started off with a bang. That morning I baked, for the first time ever in my whole entire life, a real baguette.


    Actually, I baked six of them.

    I had to keep pinching myself to make sure it was for real. I jumped up and down. I ate a whole one (and then some) for breakfast. I broke off hunks of bread for the kids. I called Mr. Handsome in from the barn to show him the loaves. Then I ran out to the barn with some fresh, buttered bread and made him get out from under his truck where he was changing the oil (or something) to eat it. He didn’t complain. All six loaves were gone in less than 12 hours.


    What is a real baguette, you ask? I’ve never been to France and I’ve never trained in any cooking school, but even so, I know this is the real thing. I just know! The loaves are long and skinny, caramel-brown on the outside, crackle-y, crispy. The insides are chewy and riddled with holes of all shapes and sizes. Finally I can understand those pictures of French people riding home with skinny wands of bread strapped to the backs of their bikes. These baguettes are solid and indestructible (wait a couple days and you have a homemade baseball bat), yet, they’re still ethereally delicious. (There’s analogy there—the most earthy things take you the highest, perhaps?—just waiting to be expounded upon. Go for it.)

    I learned about this bread at our church’s Christmas breakfast. I noticed the huge basket filled with little slices of French bread, but thinking they were some store-purchased offering, I passed them by. But then my friend MAC came bounding up to my table, took one look at my plate and exclaimed indignantly, “What? You didn’t get any of my bread?” In no time at all she had enlightened me on the wonders of her real French bread and we were weaving through the tables on our way back to the buffet line so I could amend the errors of my ways. One bite of her bread and my eyes rolled back in my head. “What—? How—?”

    MAC didn’t need any prompting. She launched directly into The Tale of The Bread and then left me alone to fill my plate and return to my seat. I made several trips back for more, and I even got kind of evangelical about it, putting little slices on other people’s plates and proclaiming, “Eat!”

    MAC promptly sent me the recipe via email, and after a flurry of questions, a couple phone calls, and a trip to the grocery store, I got down to business. And what a profitable business it has been!


    Here’s the gist. Before going to bed at night, mix up flour, water, salt, and rapid rise instant yeast (what I had to go to the store for). It can even be no-knead if you have a Kitchen Aid—just six minutes in the machine and you’re done. Let the dough ferment in the fridge over night. In the ayem, move it to the kitchen counter and let it rest for a couple hours.


    Then, crank up the oven to 500 degrees, and shape the baguettes and promptly bake them—there is no need for a second rising.


    So basically, if you get up by six, you can have fresh baguettes and coffee for a late breakfast or mid-morning snack. Be still my beating heart!


    Bread is my food. Some people like meat. Some people like potatoes. Some people like chocolate. For me, though, if I had to chose one comfort food, it would be bread. And not just any bread, either. It must be substantial, like a tangy sourdough or a chewy baguette. Served with lots of butter and cup of steaming coffee. Oh my.

    Who’s with me on this one? Anyone? Or do I have to stand alone atop my yeasty mountain of bliss?


    If bread isn’t your first choice, then tell me this: if you could choose the one food that soothes your spirit and comforts your soul, what would it be?


    Baguettes
    Adapted from my girlfriend’s recipe which she, in turn, got from Peter Reinhart’s The Bread Baker’s Apprentice

    The original recipe called for 2 1/4 teaspoons salt, but I found it a bit bland. Three teaspoons did the trick—adjust to suit your tastes.

    I used the little packs of Fleischmann’s rapid rise instant yeast. The amount called for is less than 1 packet—tape the pouch closed and save the extra for the next time. (To understand the difference between active dry yeast and rapid rise instant yeast, read this.)

    They say this dough can be shaped into all sorts of delectables—large artisan loaves, bâtards (bastardized baguettes, short and fat), pizza crust, rolls, etc. As for me, though, I’m sticking with baguettes for now. Can’t get enough of ’em.

    1 pound 11 ounces (5 ½ cups plus 2 tablespoons) unbleached bread flour
    1 3/4 teaspoons rapid rise instant yeast
    3 teaspoons salt
    2 1/4 cups cold water

    Dump all the ingredients into the bowl of your Kitchen Aid mixer and mix it (with the bread attachment, of course) for six minutes. Or, if bulky machines aren’t your thing, stir it up with a spoon and then knead by hand. (Clue: in the mixer, the dough should be dry enough that it pulls away from the sides of the bowl, but yet wet enough that it sticks to the bottom.)

    Transfer the dough to a lightly greased bowl, cover with plastic wrap, and pop it in the fridge.

    The next morning, move the bowl from fridge to counter and let it to sit for another 2-3 hours.

    Oven Prep
    Before you shape your bread, get your oven ready.


    Put one of the racks on the very highest level. This rack will hold a pan of boiling water. Set the water to boiling on the stove top and then, a couple minutes before putting the bread in the oven, pour the water into the pan and slip it in to the oven. Replenish the steam pan with more boiling water as necessary.


    As for baking the bread, there are a variety of ways to do this. Here are two:

    a) Put the shaped loaves on an upside down cookie sheet and bake it on the next to bottom rack.

    b) Put a baking stone on the next to bottom rack and allow it to heat up with the oven—get it really good and hot. Put the shaped loaves on a parchment-lined, side-less tray. When ready to bake, pull the hot stone from the oven, slide the loaves and paper onto it, and return the stone to the oven.

    Shaping the baguettes
    Using a rubber spatula that you dipped in water (to keep it from sticking to the dough), gently scrape the dough out onto a well-floured surface. Using your fingers, gently lift and adjust the dough so it makes a small rectangle, about 8 x 6 inches. Now, using a knife, cut the dough in half and then each half in three rods. You’re making baguettes so cut accordingly. There’s no point in cutting the dough into triangles or squares when you’re going for long skinny rectangles. Be lazy!


    Now, very gently, lift and stretch the dough to make a long baguette—make it as long as your baking stone or cookie sheet. Use flour to keep the dough from sticking to your fingers, but do not knead or roll the dough. You want to keep as many air bubbles in it as necessary. Lift the shaped baguette onto the cookie sheets. Repeat with two more pieces of dough. (Cover the other dough and wait to shape it till it till the first three loaves are in the oven.) Dust the loaves with flour and then score with a sharp knife. Cover the baguettes with plastic wrap and let them rest for 5 or 10 minutes. Or not. As soon as the oven is ready, the baguettes can be baked.


    Baking
    Put the bread into the preheated, 500 degree, steaming hot oven. Immediately, spritz the sides of the oven with a water bottle. Two and a half minutes later, do it again. Another two and a half minutes, spray again. Close the oven door and do not disturb for 8 minutes, at which point, turn the oven down to 475, rotate the bread, and bake for another 10-15 minutes. Aim for a total of 23-25 minutes and a burnished crust that verges on black in some places. Of course, the exact time and temperature will depend on your oven, pans, size of loaves, etc. Experiment.


    Transfer the baguettes to a cooling rack, crank up the oven, and repeat the process for the remaining three baguettes.

    Store the baguettes at room temperature. Partially eaten baguettes can be stored in a towel to prevent them from getting stale too fast. But the truth is, after one day, baguettes fade tremendously. They can be stored in a plastic bag, but their crusts turn soft (which might be a plus for some people). They can be frozen and reheated in the oven (but I have yet to try it). Dry bread can always be used as French toast, croutons, etc.

    I have submitted this post to yeastspottings.

    This same time, years previous: sweet and spicy popcorn, lentil-sausage soup, hitting the jackpot

  • Loose ends

    I have a bunch of unfinished agenda banging around in my head. Unfortunately, my disorganization manifested itself in a confusing and splat-like presentation of this morning’s Sunday school lesson. This is the curse of an out-loud thinker—if I don’t get a chance to extensively process my material with a bunch of people prior to presenting, I’m just a crazy person spouting gibberish. Mercifully, the class members gently shut me down, and now, after listening to them work on the issue for 45 minutes I know exactly (more or less) what I would say were I to ever teach that lesson again.

    But I digress. The unfinished blog agenda is what I’m to be talking about.

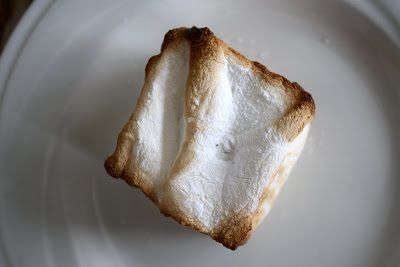
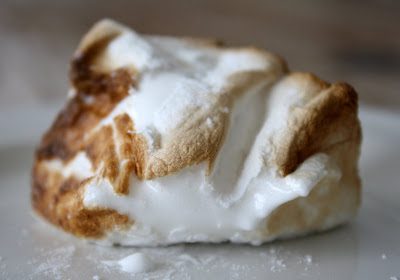
    Marshmallows
    I made another batch and rolled them in toasted coconut and then drizzled and/or dipped them in chocolate.


    I liked them, but I prefer the plain marshmallows. I’m not a huge marshmallow freak—I don’t like to eat them just for the sake of eating them—so most of my marshmallows get set afloat a steaming cup of hot chocolate. And anyway, who wants bits of toasted coconut floating in their hot cocoa? Not me!


    We’ve taken to roasting them in the fireplace. Divine.


    I mentioned that using a 9×13 pan yielded super-thick marshmallows. So the next time around I did them in a jelly roll pan, but those were too puny-thin for my liking. The third time I made them I divided them between a 9×13 and a 9×9 and they were better. But I still kind of like the huge square ones best.

    We’ve had marshmallows sitting around in jars on the counter for a couple weeks now and they’re showing no signs of going bad. So as best as I can tell, these keep indefinitely.

    Unschooling Experiment
    Our one week of unschooling has stretched into one month … and beyond. I have no desire to go back to the way things were. I’m curious to see if this unschooling period is just that, a period, or whether or not it will be sustainable for the long haul. Stay tuned.

    Cards
    Teaching my kids to play cards was one of my more brilliant moves.


    Now they play cards, Uno in particular, which grants me some much-needed reprieve at various intervals throughout the day.

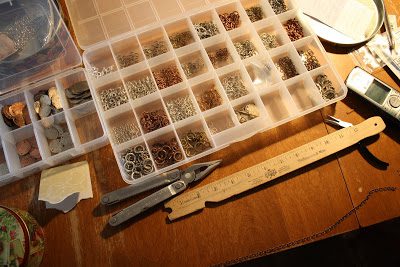
    Etsy


    As with any baby, it changes as it grows. Over the past few weeks we have learned that:

    a. pounding coins is really hard work
    b. Yo-Yo has trouble seeing the big picture (we knew that before, but still…)
    c. Yo-Yo does not possess the wherewithal or attention to detail that is required to make jewelry
    d. I enjoy making jewelry
    e. there is a market
    f. running a business makes for an excellent math curriculum


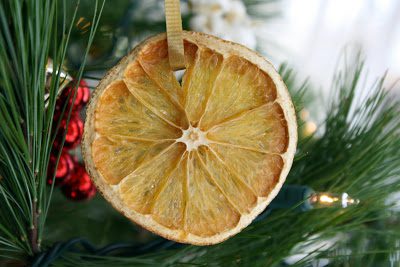
    Christmas Citrus
    These dried oranges, grapefruits, lemons, and limes really boosted our tree’s pretty factor.


    The sparkle sticks, however, have yet to be glued into twiggy stars. Maybe by next year…

    I made another batch of chocolate-dipped candied orange rinds. I used six oranges and still had plenty of syrup. It yielded about three pints of chocolate sticks.

    I used the leftover orange syrup in my simple granola recipe. (I omit the granulated sugar and add 1 3/4 cups of orange simple syrup in place of the water.) It adds a very subtle orange flavor to the granola. And it makes me think that some orange zest would be a swell addition to the French Chocolate Granola. Chocolate, coconut, almonds, and orange zest—how could it go wrong?

    Article
    Remember that article that I mentioned? The one that got accepted? Well, it’s out in the January-February issue of Home Education Magazine. The author’s copy came in the mail. I opened it at the dinner table and did a honkin’ big happy dance, war whoops and all, right in front of my wide-eyed young’uns and bemused husband.

    Not the actual I’M PUBLISHED!!! Dance, but you get the idea.

    Miss Beccaboo was shocked, absolutely shocked, to see a picture of herself in a glossy magazine. Later she confided, “I wish you would’ve told me about it ahead of time so you could’ve gotten a better picture of me.” I told her that I chose that picture because it was beautiful. That was all the assurance she needed—she scampered off, pacified.

    This same time, years previous: maybe not a true confession