• Rice, both brown and white, and Non-PC Chicken

    I go through phases with foods, especially with the starches. For a while our meals will be bread based, and then I’ll move on to potatoes. Pasta and rice take their turns. Once I start thinking in terms of one starch, then it’s all I can think of. I get in a rut. Pasta this and pasta that. Eventually we tire of the repeats and variations on a theme, and I shift, with great mental groaning and moaning, my focus to something else, say rice.

    We’ve been eating a lot of rice. I made a big batch of Indian chicken and brown rice for dinner the other week and then we had tons of leftovers. We finished off the brown rice before the chicken, so I made a pot of white basmati rice to accompany the leftovers.
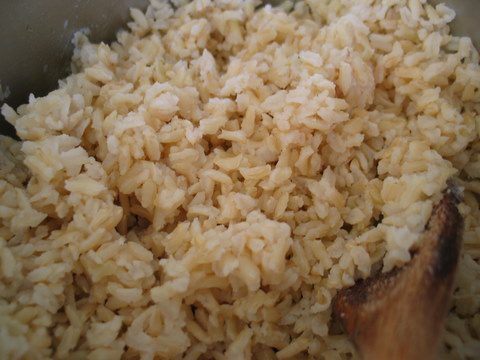
    Brown Rice
    From my Girlfriend Kris

    2 3/4 cups brown rice (right now I’m using Organic Californian Long Grain)
    5 cups water (or chicken broth, for a special treat)
    1 ½ teaspoons salt
    1-2 tablespoons olive oil

    In a heavy-bottomed saucepan bring the water to a rolling boil. Add the salt and olive oil, then pour in the rice. Give it a good stir. Bring the water up to a boil again (with the lid off), stir again, and then turn the heat down to low and put the lid back on the kettle. (If you have an electric stove, scoot the kettle half off the burner for the first several minutes to let the burner cool down a bit.)

    Let the rice cook, untouched, for 45 minutes. Then, turn the heat off, but leave the kettle on the burner, untouched, for another 10 minutes. Take the lid off to see if all the liquid has been absorbed. If so, it is done and you can fluff and serve. If not, turn the burner back on to low heat and cook the rice until it’s done, checking every five minutes or so.


    I like to make supper’s rice during the middle of the afternoon. That way I don’t have to feel rushed come suppertime. Also, I think it tastes better when it’s had some time to set for awhile.

    White Rice


    2 cups white rice (I’ve been using Lone Pine Organic Long Grain Basmati)
    4 cups water
    2 teaspoons salt

    Put all the ingredients in a heavy-bottomed saucepan and stir well. With the lid off, bring the mixture to a rolling boil. Stir it well, and then turn the heat down to a low simmer and put the lid back on the kettle. Take precautions so the rice doesn’t boil over (see the recipe for brown rice for further details in regards to this part). Let the rice cook, untouched, for 20 minutes.

    Now, on to the chicken part of our rice fest.

    This last time that I made this Indian chicken dish, I used three pounds of skinless, bloneless chicken breasts. Yes, they were non-organic (gasp). I am not a perfectionist, and to be blunt, some of the time I just don’t really care. (GASP!)

    (Hey! That big collective gasp just sucked all the air out of the room. I can’t breathe. Exhale, please!)

    Sometimes I do care. Really. I do have a bit of a conscience. I can be politically correct. (Last year’s Thanksgiving turkey was organic and very, very expensive. Just ask Mr. Handsome. He had a cow about it. A figurative one, of course. If it hadn’t been a figurative one, we could’ve butchered it and eaten the cow instead of the very very expensive organic turkey.) But you know, you can only worry about so much. And boneless, skinless chicken breast is really easy and quick and yummy, and sometimes that’s all I have energy to care about.

    So anyway, I chopped up the non-organic chicken, cooked them in a little bit of oil, and then added the chicken to the sauce and baked it for about an hour. This isn’t how I normally make this dish (now will you please stop waggling your fingers at me?), so in the following recipe I’ll explain how to make your Indian chicken, the PC way. (If you want to follow my non-organic example, feel free. I won’t gasp.)

    Indian Chicken
    Adapted from the More-With-Less Cookbook


    This is one of my standby company dinners: simple, spicy (but not so much so that it’s offensive to a child’s palate), unusual, and delicious.

    1 organic, free-range chicken, about three pounds, purchased downtown at your local farmer’s market
    3 large onions, from your garden, chopped
    3 tablespoons oil or butter
    5 tablespoons flour
    3 tablespoons curry powder
    1 ½ teaspoons ginger
    1 ½ teaspoons salt
    ½ cup honey
    1/3 cup soy sauce
    4-5 cups chicken broth, that you made yourself

    Boil the chicken in a pot of water until the chicken is falling off the bone. Remove the chicken from the pot and leave it alone until it’s cool enough to handle. Pick all the bits of chicken off the bones, chopping up the bigger pieces. Put the bits and pieces of meat into a bowl and set aside. Do not throw out the chicken bones and fat—put them all back in the soup pot and make a chicken broth.

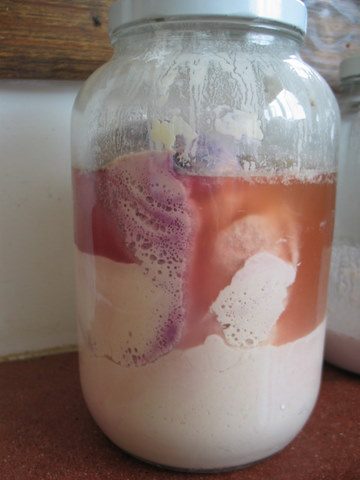
    (For my chicken broth, I cover the bones and fat with water, filling the kettle up to the very top. I add a chopped onion, carrot, and stalk of celery, bay leaves, peppercorns, and salt. I simmer the whole mess for 8-12 hours, strain the mixture and put the broth in jars, filling them only three-quarters full, and stick them in the freezer.)

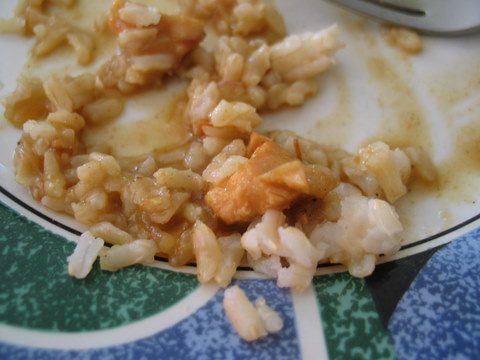
    In another soup pot, one with a thick bottom, saute the onions in the oil or butter. When they are tender, add the flour, curry powder, ginger, and salt. Stir well, and then add the honey, soy sauce, and chicken broth. Bring the sauce up to a simmer, stirring well, until it has thickened. Add the chicken pieces and heat through. Serve over brown or white rice.


    Indian chicken leftovers freeze well.

  • Cheap Entertainment At My Expense

    I declare, my bread baby is taking over my life. Things get rather complicated when you start playing with water, grapes, and flour, and it’s all I can do to keep that baby (the ornery little cuss) on track. And now I have two of them.

    I’m just dropping a line here to let you know what’s going on. If it feels like I’m neglecting this site, it’s because I am. If you need some entertainment, you can click on the Sourdough Bread site and watch my frustration levels leap and dive and soar.

    (If I sound grumpy, it’s because I am.)

  • Part Two: Making the Starter, Again (chapters 7- 8)

    Chapter 7: All Over Again
    Day 1, and Day 11: September 9, 2008
    This is getting really confusing. Part One is done. Part Two has begun. But I’m fiddling with the starter from Part One (that’s the starter for Day 11) but I’m starting it back at the beginning, so it’s really also on Day 1, but with a little head start (maybe). I can’t keep this straight. Plus, I’m trying to organize this into the most readable fashion, but I’m not computer savvy I get really confused. I type these posts with a very scribbled-upon yellow notepad perched on my knee. Not to mention I have a slow internet connection. And it’s rainy outside.

    Anyway, I’m not going to document the growth of the new starter like I did the first time around in Part One. I will be doing most everything the same, and I’ll let you know if I do anything different. I will take pictures occasionally, just so you can see how things are coming along.

    Just for simplicity’s sake, we’ll refer to this brand new baby as Baby Number Two. The old baby that died, upon which I am attempting to miraculously revive, we will refer to as Baby Number One. The regeneration plan for Baby Number One is completely up in the air. I am not referring to any books or manuals—I’m just winging it. We will follow this baby more closely (for now) than the other.

    Part Three will detail the makings of the breads. If we ever get there.

    Is all this clear? Are you still with me? Hello? Hello?

    Day 2, and Day 12: September 10, 2008
    Twenty-four plus hours after beginning the new baby and it’s looking pretty good. The flour is bubbling up and the liquid is sinking down. I’m hopeful (or else a fool).


    I wonder why I couldn’t make bread with it now. Why do I have to wait ten days to start regular feedings? Is it for the sour flavor? And what about just mixing wine with flour and water? Would that have the same effect?

    The old baby, on the other hand, still looks rather dead. I’m ignoring it.

    Day 3 and Day 13, September 11, 2008


    This new baby is going berserk. The bag of grapes is pushing up to the top, and the jar of water has been ousted from its King Of The Mountain position and has sunk to the bottom of the ar. It smells good, too.

    The other baby is still there. The bag has inflated, and there is a bit of liquid sitting on top. That’s all.

    Day 4 and Day 14, September 12, 2008


    My Girlfriend Shannon visited me this morning. She took one look at my baby sitting on the counter and declared, “That is one ugly baby.” She’s right; it is hideous.


    I fed both babies today. Baby Number Two got the requisite cup of water and cup of flour and a nice swishing. I pushed the sack of grapes to the bottom and pressed the pint jar of water down on top. Silverton says that you can use the starter to do some baking at this point, though she claims the flavor would be compromised. I’m pondering taking some starter out and getting it going on a regular feeding for several days. I’m dreading letting it sit for five whole days—it seems like that’s when it always goes kaput.

    I gave Baby Number One a half cup each of water and flour, as well as a swishing. Baby Number One smells surprisingly nice. Maybe…


    I’m not holding up to well emotionally. All this waiting and worrying is taking a toll on me. I just want to get past this part and on to baking bread. I hate this part. What makes me mad is that I’ve done it all before, so I know I can do it. It should be a simple matter—follow the instructions and make a starter, right? But this process is just not concrete enough. It’s eluding me, and I don’t like to be eluded.

    Chapter 8: Playing Around
    Day 5 and Day 15, September 13, 2008
    Last night I did some on-line reading about sourdough starters. Most of the starters that used only water, flour, and grapes have a very similar start-up process as Silverton’s. The variations were minor: one said to start regular feedings on Day Eight, another said that you could start baking right away once you start regular feedings (Silverton says to wait for five more days to get the starter well-established and strong), another said to only feed the baby twice a day, and yet another explained how to make the starter with just water and flour. All of the directions made the whole process seem simple, so either the authors are all very devious, or I’m just dense. In any case, it was good for me to see the possible variations in the process. I began to see that it just might not be an all or nothing proposition.

    As my mother says, “Hope springs eternal.”

    So this morning I took Baby Number One and removed its placenta, I mean, it’s bag of grapes. I put one cup of the rosy pink starter in a gallon jar and fed it some flour and water (same portions as before). I’m going to continue to feed this baby for several days to see if anything new develops. It had a nice tangy odor this morning, so just maybe…


    Baby Number Two is busy fermenting. The bag of grapes is hugely swollen.


    I think Hope is hiding out in there.

    Day 7 and Day 17, September 15, 2008
    I don’t want to jinx myself or Baby Number One. I’m scared to say it, but I need to, I think. I feel the words and emotions burbling around down in the bottom of my throat. I’m afraid I might blow… MY BABY IS ALIVE!!!

    Goodness! I did blow!

    Now, let’s not talk about it anymore. I’m doing some psychological tiptoeing. In other words, I’m feeling fearful, nervous, superstitious and excited.

    Note: I am trashing this odd way of posting that I’ve developed. I was intending it to read like a story, but it is getting too cumbersome for me to scroll all over the place and do all that cutting and pasting. So from now on, I’ll just be posting like this is a normal blog. Parts One and Two will still be as there in the archives, just the way they are in their tediously long narrative format.