I loved this bread the last time I made it. The seed combination is brilliant, a perfect combo that mirrors a seeded sourdough bread I used to buy at our farmer’s market that made me go all swoony.

But I made a mistake this time. (I’ve been making a lot of mistakes, but I try not to dwell on them too much because then I get discouraged and am no fun to be with.) I used seeds that had not been stored in the freezer (I do know better) and had been piled listlessly in the corner of my kitchen cabinet for a year, or, oh I’m so embarrassed, more. So the seeds were a little bitter, which kind of ruined the effect.
Moral of the lesson—buy fresh seeds if you are going to make this bread, and then store them in the freezer until you need them again.

George’s Seeded Sour
Adapted from Breads from the La Brea Bakery by Nancy Silverton
2 1/4 cups (1 3/4 pounds) white starter
1/4 cup (2 ounces) milk
2/3 cup (3 ½ ounces) whole wheat flour
½ cup (1 1/3 ounces) dark rye flour
2 tablespoons bread flour
1 ½ cups (10 ounces) cool water
2 ½ tablespoons quinoa
2 ½ tablespoons millet
1/4 cup amaranth
1 tablespoon poppy seeds
5 cups plus 2 tablespoons (1 pound and 5 ½ ounces) bread flour
1 tablespoon sea salt
Start the bread in the late afternoon of Day One:
Make a sponge with the first five ingredients: using a spoon, mix them altogether in a bowl, cover tightly with a shower cap and leave the bowl sit on the counter until it has doubled, about three hours.

Put the water, sponge, grains, poppy seeds, and flour in the mixing bowl and knead for four minutes. Let the dough rest for twenty minutes.
Add the salt and mix for another five minutes. The dough will be sticky. Knead it by hand on the counter for a couple minutes and then put in a lightly oiled bowl, cover with a shower cap and chill in the refrigerator for about six hours, or overnight.
Morning of Day Two:
Remove the dough from the refrigerator and take off the shower cap. If the dough has not yet doubled, let it sit at room temperature until it does.
Cut the dough into two pieces and shape into elongated boules, about ten inches in length. Lay them on the counter, smooth side up.
Prepare your proofing tray: Lay a cloth on a cookie sheet, lightly dust it with flour and bunch up the cloth in the middle, creating a little wall to divide the two loaves.
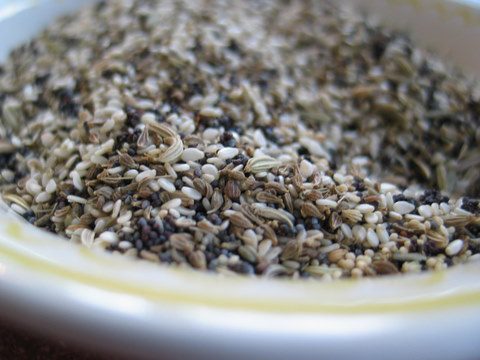
For the seed mixture:
2 tablespoons amaranth
½ cup sesame seeds
3 tablespoons poppy seeds
3 ½ tablespoons anise seeds
3 teaspoons fennel seeds
Mix the seeds together in a small bowl and then pour into a large tray that has sides.

Now’s the fun part. Spritz the tops of the loaves with water, roll them, wet-side down, in the seed mixture and lay them, seed-side down, on the proofing cloth.

Cover them with another cloth and allow to proof for three to four hours.

Heat the oven to 500 degrees. Flip each loaf over, dock them, and slip them, seed-side up, into the oven. Follow the same spritzing and baking procedure that you use when making the Country White.


4 Comments
Jennifer Jo
Betty Crocker, I would be honored to teach you to make sourdough!
-JJ
Anonymous
I had no idea you were baking so much bread! It all looks just beautiful! WOW! In the new year can you teach me how to make sourdough bread? KK is asking for it on a regular basis since tasting a bun at your house… It was reeeeeally good! I’m inspired to make more bread now.
Anonymous
I forgot to say that I would give a lot to have a taste of that bread made with fresh seeds. It looks just like some delicious rolls we ate when in Europe nearly 3 yrs ago.
Aunt V.
Anonymous
This is precisely why I use my Food Saver so religiously. I use it way more often than necessary but as soon as I don’t I have something go stale. That really gripes me because I either spent time or money on whatever it is that I have to feed to the chickens. It also eliminates yucky freezer flavor/burn.
I have in my cupboard or freezer at least 100 quart jars full of vacuum sealed food etc. ranging from tea bags to tubes of glue that are opened and would be all dry and hard the next time we need that kind of glue. Believe me this works. I just love my fresh from the oven tasting granola that is 5 weeks old.
-Aunt V.